")
Creating your first online course doesn’t need to be complicated. Most people overcomplicate online course creation, but it really can be simple when you follow a clear, step-by-step system. Be sure to grab my FREE Universal Course Framework. It will provide you with the step-by-step framework you need to build a profitable course.
Let’s dive right in — because I know you don’t have time. You have a course to create.
Step 1: Put Your Entrepreneurial Hat On
If you want to get paid for your online course, you are not just a creator — you are an entrepreneur.
When I created my first course, I was still teaching. I had a great idea, but:
- I didn’t know the tech
- I didn’t know sales
- I didn’t know marketing
If you treat your course like a hobby, it will pay like a hobby.
If you treat it like a business, it can become a real income stream.
Start with a business mindset.
📌 Internal link suggestion: “Course creator mindset” or “How to think like a digital entrepreneur”
Step 2: Time Block Your Course Creation
Put course creation on your calendar.
Block off hours or days and protect that time. Don’t let distractions or side projects pull you away.
Also set a launch date.
Deadlines create momentum. Just like school projects, you get it done when it’s due.
Write it in red on your calendar. Treat it as non-negotiable.
Step 3: Validate Your Course Topic Demand

If there’s one thing to spend the most time on, it’s this.
If nobody wants your topic, everything else is wasted. You need to start with a course topic that will actually SELL.
Start with your audience:
- What are their struggles?
- Limiting beliefs?
- Obstacles?
- What problem are they trying to solve?
Then create a course that solves that exact problem. Check-out my FREE Workshop on How to Choose a Course Topic.
Create Your Ideal Student
My dream student is “Sarah”:
- Busy mom
- Full-time job
- Lots of tabs open mentally
- Craves clarity and speed
- Ready to take action
When someone like Sarah joins my course, I already know she’ll succeed.
Be this specific.
Step 4: Name Your Course Strategically
Naming takes longer than you think.
Make it:
- Unique
- Specific
- Not generic
Bad: Gardening 101
Better: Hydrangea Planting 101: How to Grow Hydrangeas in Any Zone
Use: Short course name + clear tagline
Step 5: Define Your Course Transformation (Your Promise)
What tangible result will students get?
Not: “You’ll get better at gardening.”
But: By the end of this course, you’ll know exactly when, where, and how deep to plant hydrangeas so they thrive every year.”
Make it measurable and achievable.
Step 6: Create Your Signature System
This differentiates you from other course creators.
Your unique:
- Framework
- Method
- Workflow
- Roadmap
Give it a name. This builds credibility and makes your course feel proprietary.
Step 7: Brain Dump Everything You Know
Open a Google Doc. Dump everything.
Don’t worry about the grammar or structure. Just record all your ideas, tips, experiences, stories, examples, etc.
Get it all out. Even if it’s not everything you want to teach in one course, get it down.
Step 8: Turn Your Brain Dump into a Course Outline
Use AI to help organize.
Paste your ideas into ChatGPT and ask it to structure your content into modules. Use my ChatGPT Outline Prompt.
Then refine:
- Does it flow?
- Does it lead to the promise?
- Anything extra?
- Anything missing?
This saves hours.

Step 9: Plan Your “Value Meal” (Upsells & Order Bumps)
THIS is what I teach my students to do in my programs that no one else teaches. What will you offer your future buyers when they check out? It should not JUST be your course. It should be something in addition to your course to help them get the result quicker, or answer the next part of the puzzle they face when they’re finished.
This will increase the overall price someone pays you when they check out, and is an easy way to get more sales. When put together, it creates a “Value Meal” or a stack of products that go together and will help your student the most.
These small related offers can be:
- Templates
- Checklists
- Bonuses
- Mini trainings
- Workshops
- PDF’s
You can choose 1-3. The result is that a $100 course can become $150–$200 easily.
I wish I had done this from the start — I would’ve made $20k+ more my first year.
Step 10: Choose Your Delivery Method
Decide how you’ll teach:
- Talking head video
- Screen recordings
- Slides
- Demonstrations
If using slides, I recommend:
- Canva
- Microsoft PowerPoint
Both offer easy templates. If you want to use the slide templates I created for my students to use, you can grab them HERE.
If you’re not using slides, I strongly suggest creating a rough script outline so you don’t ramble and waste time. There are teleprompter apps that I love to use when recording with my phone that make me breeze through recordings.
Step 11: Practice Before Recording
Don’t read slides word for word and always make sure you include bullet points, NOT entire paragraphs.
Know your material well enough to teach naturally. People WILL be able to tell, trust me.
If helpful, use a teleprompter app like:
- PromptSmart Pro
But don’t sound robotic.
Step 12: Prepare For Recording
Before you start, you need to test your:
- Lighting (picking the right lighting makes a huge difference)
- Audio (is the mic your using a good one?)
- Battery (have backups if using a DSLR camera!)
- Storage (everybody runs out mid-recording and it’s SO frustrating!)
Record a short test video first. View it on the computer so you can see on a bigger screen with the right resolution.
You do NOT want to re-record everything. I share many tips in my course and coaching program.
Step 13: Batch Record Your Lessons
Treat it like meal prepping.
Block 3–4 hours and knock it all out at once.
You’ll save time and keep consistency and don’t need to spend hours getting yourself and your recording set-up ready every time.
Step 14: Edit Your Videos
If you want simple, use:
- Loom
- Focusee
- CapCut
Loom and Focusee records AND edits in the same platform. Capcut is just for editing, but all tools are beginner-friendly.

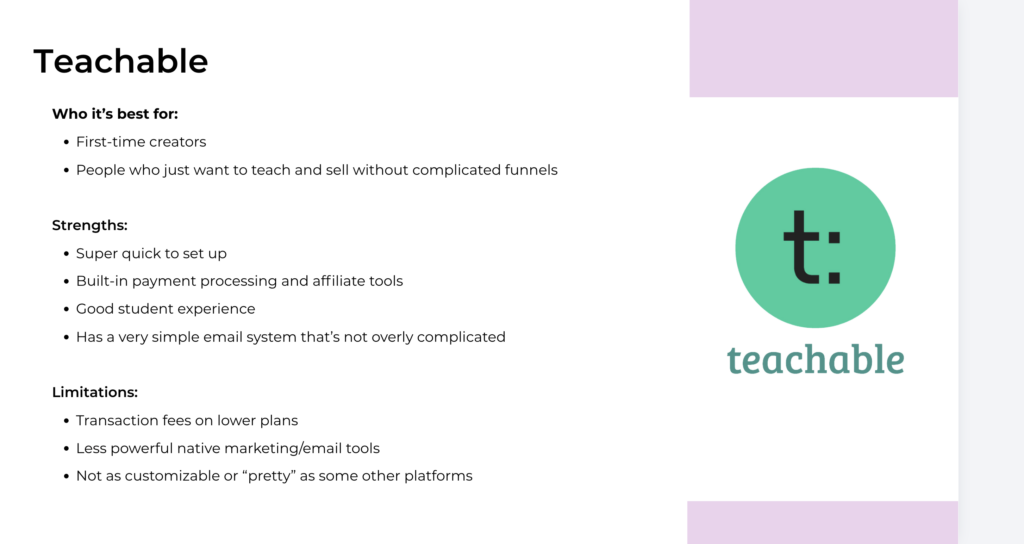
Step 15: Choose Your Course Platform
This is important. Don’t go cheap just because it’s free. The worst thing to do is to upload all your videos, create your sales page and then realize it can’t send emails to students or charges you a fee for every purchase.
These are the TOP most popular course platforms that I highly recommend:
- Teachable
- Thinkific
- Kajabi
I have a mini course that compares the two platforms so you can choose the one that is best suited for your needs. I also show you how to upload your course to each platform.
The idea is to choose something you can grow with long term.
Step 16: Upload & Build Your Sales Page
Once you choose your course platform, upload all your videos, add your branding, and create your sales page.
This takes time, as video uploading can slow you down a bit. Plan at least two days. I recommend working on your sales page while you wait for your videos to upload.
Make it look professional but do not spend hours and hours on fonts and colors. No one cares about that. Focus on your sales page copy and messaging. They are EXTREMELY important to getting people to pull our their credit cards!
Step 17: Price Your Course
Start lower. You can always raise prices later.
I never recommend going below $20, If it’s a mini course, it will be less money but the number of lessons should not determine the price. What typically determines the price of your course is the value and transformation people achieve at the end. If it’s more of a life-changing promise, like increasing their income or getting healthier, you can charge more.
Pull in those testimonials first, then consider increasing your price based on what people say. If you are not getting testimonials, that may be because your students are not finishing your course, which is another problem altogether. You may need to go back to the drawing board to figure out where you’re losing them.
Step 18: Set Up Email Marketing
Use a real email provider. Not a cheap one. I recommend Kit (formerly ConvertKit) because it’s for creators looking to grow and scale their business. Flodesk and Mailchimp are popular as well.
Once you sign up, just connect email to your platform so:
- Buyers get access automatically
- You can nurture them
- You can sell future offers
Step 19: Test Everything
Buy your own course for $1 (or set up a demo) and see how everything runs. Most course platforms offer this for creators so they can test things out. These platforms process all sales on their own, making it super easy to collect your share! All you need to do is test:
- Checkout experience (is it easy and seamless or confusion?)
- Emails (do they immediately receive a confirmation email with log in info?)
- Tags (do they get tagged so you know which subscribers have already bought your course)
- Links (do they all work? Are they downloadable?)
- Access (Do they get immediate access?)
Fix anything broken or update any confirmation emails to be a bit more personal if you prefer. Add your logo or own message. Make sure your students know what to do once they sign up.
Step 20: Launch Your Course
This is where all your work pays off. But remember: Sales come from warming your audience first.
In my programs, I teach my students to build a waitlist. Pre-sell! Get people excited before launch day. That’s how you make real money.
Final Thoughts
Online course creation doesn’t need to be overwhelming but it can definitely take a long time if you are wasting your time on the wrong things. These are the steps I take my students through in my coaching program…
Follow the steps:
- Approach with a business mindset
- Validate the demand
- Determine the finish line
- Outline tightly
- Record with enthusiasm
- Upload
- Launch and celebrate!
Simple. Repeatable. Profitable.
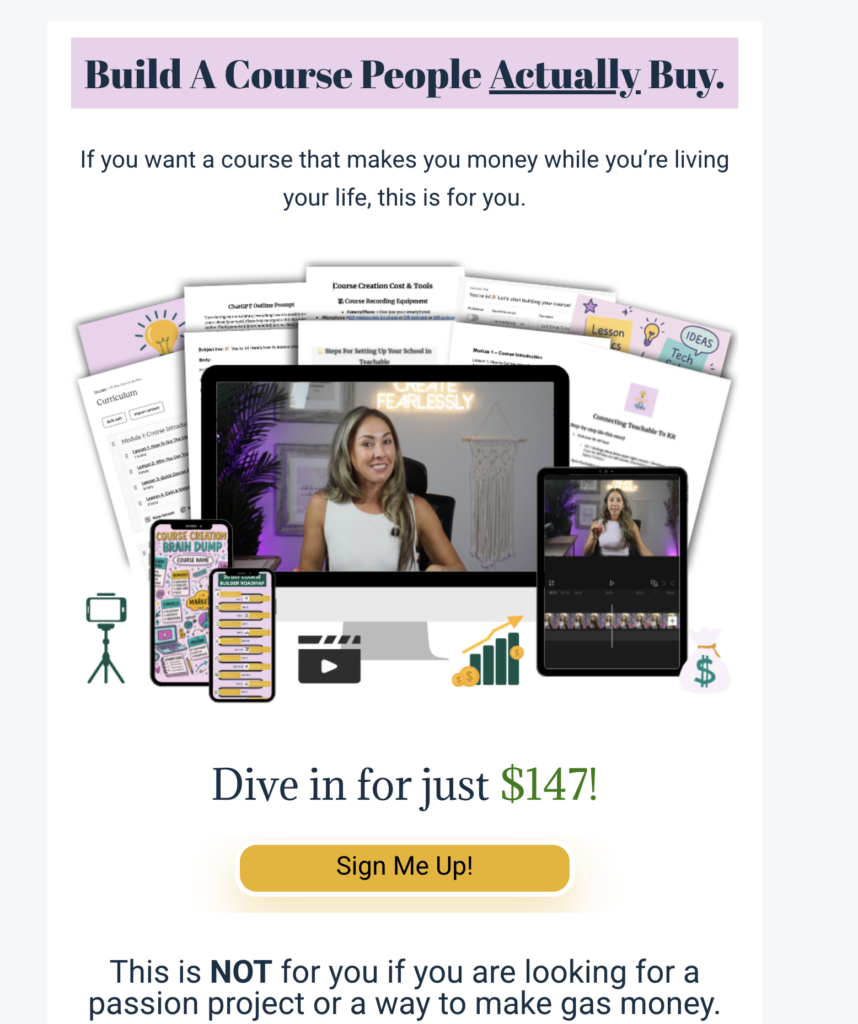
If you want my full 20-day roadmap walking you through this step-by-step, check out my course and accelerator program.
Best of luck — now go create your course!! 😉
Need more support? I teach this entire process inside my 20‑Day Course Builder, where I walk you through: This course will help you find financial freedom doing something you love. Most people dream about creating a course. But not you. You actually make it happen
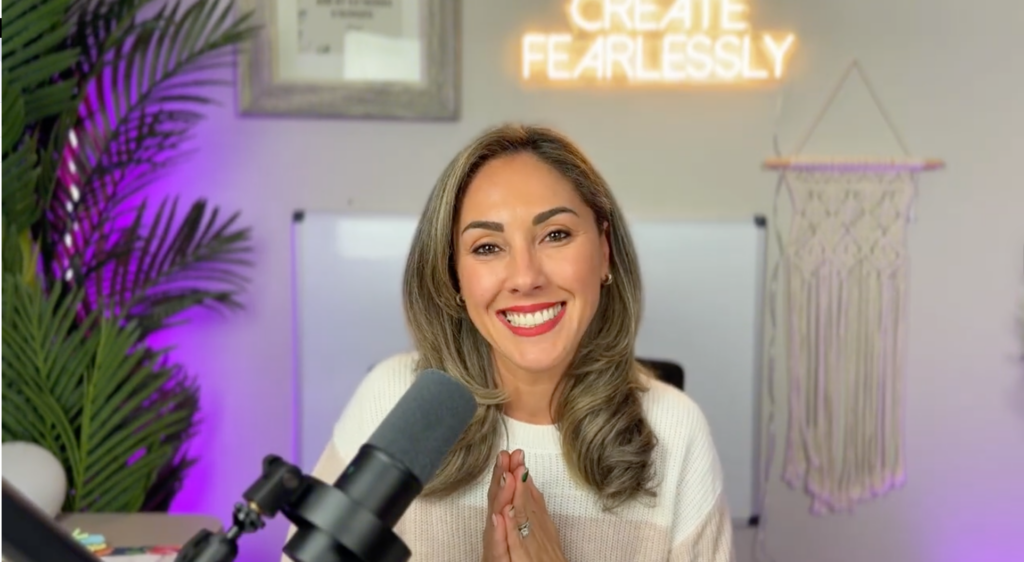
Create fearlessly.
Be honest…what part of this are you still stuck on? Drop it in the comments. I actually read them. ⬇️